Halloween Pudding Cups
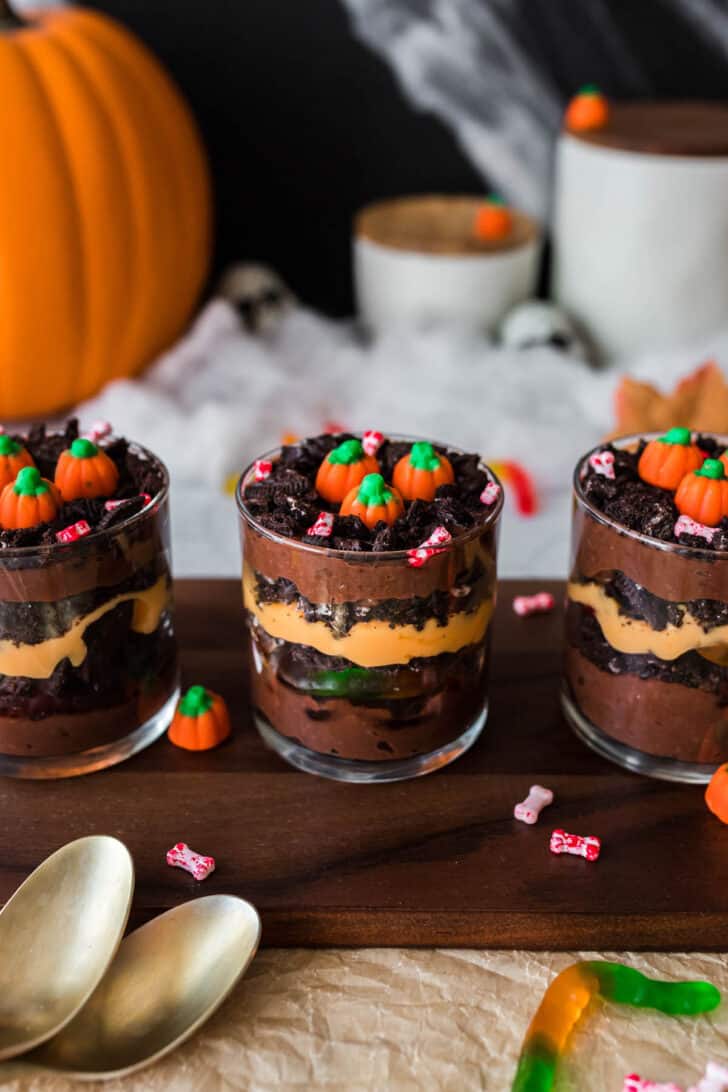
Halloween Dirt Cups are a creepy dessert that kids and adults alike will love. This super simple treat is layered with pudding, cookies and candy.

Give ’em pumpkin to talk about with these Halloween Pudding Cups!
If I’ve learned one thing over the past few years, it’s that Halloween food ideas are basically endless! If you can think of a dish or type of food, you can Halloween-ize it.
My Halloween charcuterie board and Halloween deviled eggs recipe are good examples. And today, I’m back with a treat that kids and kids at heart will love.
For many of us, dirt pudding brings on the childhood nostalgia. I didn’t have it at home, but I do remember it being offered as a birthday treat at school and parties.
If you’ve never had it, it’s layers of pudding (usually chocolate) and crushed up Oreo cookies. These ingredients provide the “dirt,” and then you can’t forget the gummy worms crawling out of the dirt!
I’ve spook-ified this classic dessert even more for these Halloween dirt cups.
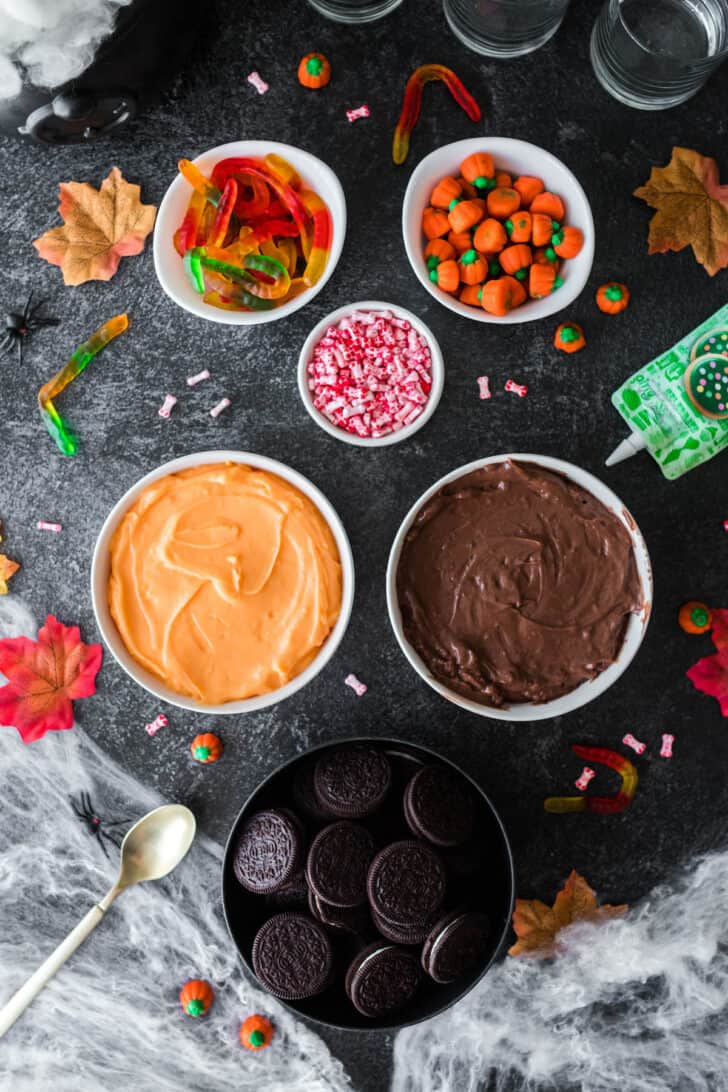
What you’ll need for Dirt Pudding Halloween cups:
- vanilla pudding – this will be turned into the orange layer for the Halloween pudding cups.
- chocolate pudding – this is the key “mud” ingredient in dirt pudding!
- food coloring – you’ll need orange food coloring, or a combination of red and yellow colorings to turn the vanilla pudding orange (more on this below).
- Oreo cookies – classic Oreos are really best here, but if you want to use a generic version, go right ahead. You’ll need about 24 cookies. Any leftover cookies can be used to make Oreo fudge another time.
- gummy worms – it’s not dirt pudding without gummy worms lingering in the dirt! They’re essential.
- pumpkin candies – these add that Halloween twist to this version of dirt pudding, and make each cup look like a little pumpkin patch.
- bone sprinkles (optional) – keep it CUTE Halloween with just pumpkins, or add a spooky element to the Halloween dirt cups with bloody bone sprinkles.
How to make Dirt Cups (Halloween)
How to color the pudding for Halloween pudding cups:
If you’re Halloween-crazed like I am, you might have orange food coloring on hand at all times. If not, I understand. It’s really not that common of a color for most dessert decoration!
But if you have red food coloring and yellow food coloring, you can make orange very easily. For a prepared box of vanilla pudding, you’ll need to add four drops of red food coloring and five drops of yellow food coloring to stir together to make orange.
The drop guidelines above are for traditional food coloring. If you use the more concentrated gel version of food coloring that is commonplace these days, you will need less.
Add a little bit of each color at a time and stir, then adjust as needed until it’s the perfect color for Halloween pudding cups.

How to layer Halloween dirt cups:
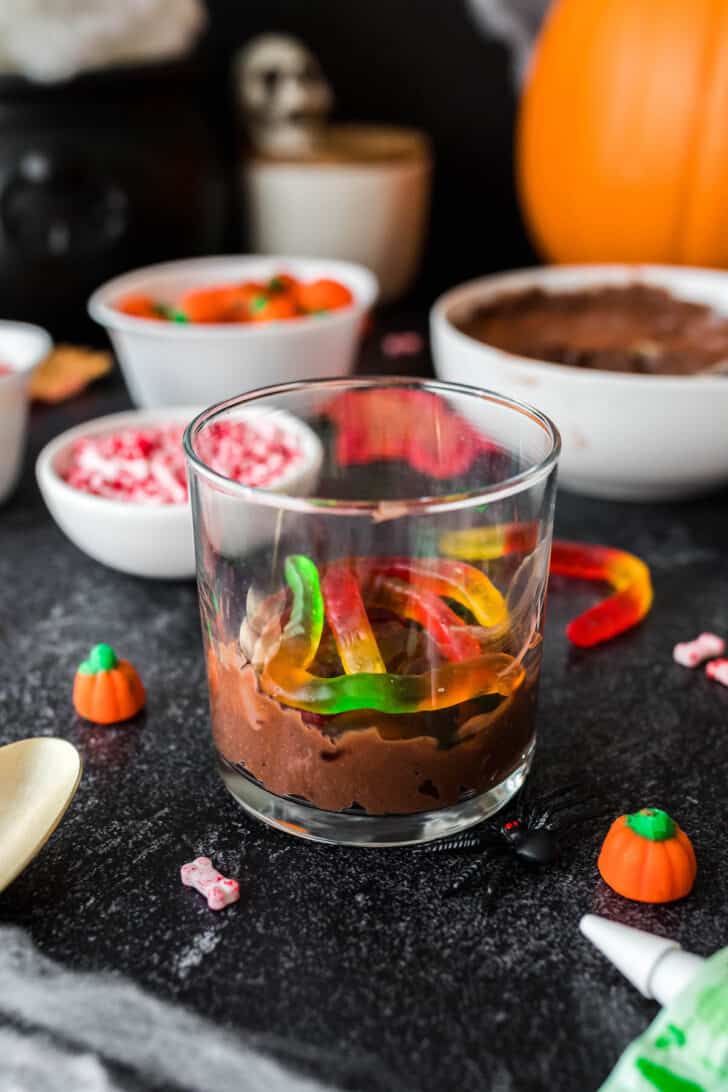
- First, add a spoonful of chocolate pudding to each glass and carefully spread it evenly into the bottom of the glass.
- Next, add a few gummy worms, and then a sprinkle of crushed Oreos.
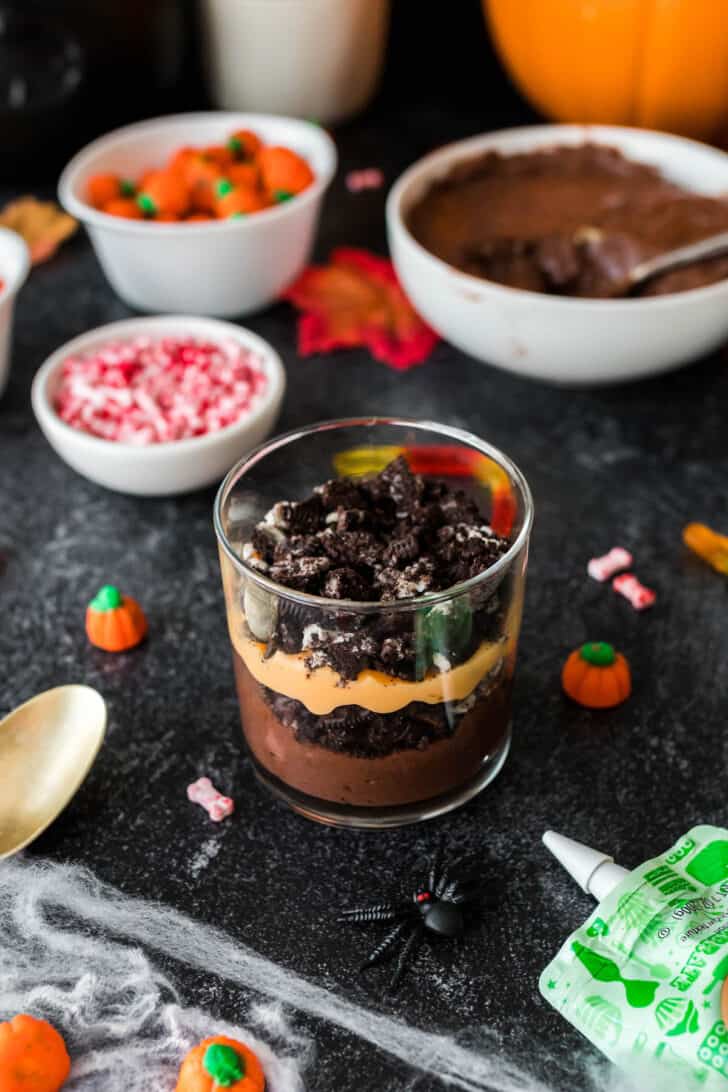
- On top of the Oreo layer, spread a spoonful of orange-colored vanilla pudding, followed by more crushed oreos.
- The final layer of pudding will be another spoonful of chocolate pudding.
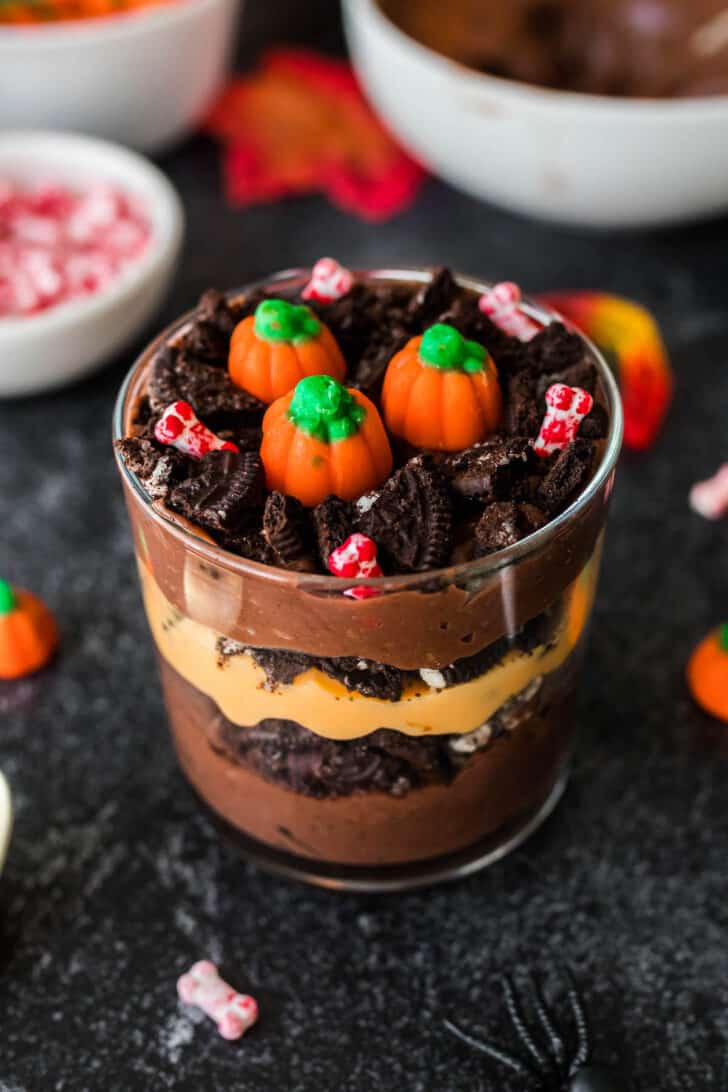
- Top the pumpkin patch dirt cups with a generous layer of crushed Oreos. Place three candy pumpkins on top, and add a sprinkle of the bloody bone candy if you’re using it. You can even make it so some of the bones are sticking out of the dirt at funny angles.
How to serve Halloween Dirt Cake Cups
How many servings of Halloween dirt pudding does this make?
Using the entire prepared (3.4 ounce) box of chocolate pudding and about half of the prepared (3.4 ounce) box vanilla pudding, I made eight cups of Halloween dirt pudding using 10 ounce glasses (like a double old fashioned-size glass that I would use to make a basil cocktail or something).
If you don’t have this exact size of glass, you could use bigger or smaller glasses, and just make a few more or a few less cups. Halloween dirt cups all about FUN, so don’t stress!
You could even make them in to a bunch of shooters, like my Valentine dessert shooters, but you’d need to serve them with spoons small enough to fit into the glasses.
I did have about half of the vanilla pudding left over, which I just snacked on while making the Halloween pudding cups. If you didn’t want leftovers, you could make a thicker middle layer of the orange pudding if there’s room in your glasses!

Add even more embellishment to these Halloween Dirt Cake cups:
If you want to add an extra special little touch to these Halloween dirt cups, you could use green decorating gel to create vines between the pumpkins and really make it look like a pumpkin patch.
And if you have a bunch of Halloween sprinkles left over from making another treat like Halloween cake pops, feel free to add a sprinkle of those!
Pro Tip: Make these Dirt Pudding Halloween cups in advance!
Not only CAN Halloween dirt pudding be made in advance, but it SHOULD be made in advance! This makes it ideal for parties and gatherings.
Halloween dirt cups must chill in the fridge for at least two hours (wrap them tightly first). Personally, I think dirt pudding has the best flavor and texture after a full 24 hours of chilling. The Oreos get nice and soft and soaked with pudding, and are just so delicious.
Halloween pudding cups can hang out in the fridge for up to 2 full days. After that, the cookies get a little TOO mushy and it’s not as good.
Troubleshoot Halloween Dirt Pudding
Why is my pudding grainy?
Most often, grainy pudding is a result of not dissolving the instant pudding mix properly. To ensure a smooth texture, make sure you whisk the pudding mix into the cold milk for a good two minutes, or however long it directs you to on the package. This allows the starches in the pudding mix to hydrate fully, which is what gives the pudding a velvety texture.
Why is my pudding not hardening?
If your pudding isn’t setting correctly, it could be due to a few reasons:
- Ensure you’ve used the correct ratio of milk to pudding mix.
- Check the expiration date on the pudding mix. If it’s expired, it may not set properly.
- Make sure you allow enough time in the fridge. Most instant puddings take 2 to 4 hours to set, but overnight is even better for perfect firmness.
Storing this Dirt Pudding Halloween recipe
Store any leftovers in the fridge, tightly covered in plastic wrap, for up to 2 days. You may want to remove the gummy worms and pumpkin candies before storing, and replace them with new ones before serving again, as they could get a little dried out in the fridge.
Dirt Cups (Halloween) FAQs
Dirt cups are typically made of layers of pudding, crushed chocolate cookies (for the “dirt” layer) and spooky decorations like gummy worms.
Dirt cake, or dirt pudding, is believed to have originated in the United States during the 1970s. It gained popularity quickly as a whimsical and fun dessert for kids of all ages.
Instant pudding typically takes 2 to 4 hours to set in the refrigerator. For best results, consider allowing it to set overnight for a firmer texture.
Yes, you can overmix pudding. Overmixing can cause the pudding to become too thick and even grainy. To avoid this, follow the instructions on the package to a tee.

Halloween Dirt Cake Cups
Halloween Dirt Cups are a creepy dessert that kids and adults alike will love. This super simple treat is layered with pudding, cookies and candy.
Ingredients
- 4 cups milk, divided, for preparing puddings
- 1 box (3.4 ounces) instant chocolate pudding mix
- 1 box (3.4 ounces) instant vanilla pudding mix
- Orange food coloring (see Home Chef Tip)
- 1 cup gummy worms
- 22 Oreo cookies, crushed
- 24 pumpkin candies
- 2 tablespoons bone sprinkles (optional)
Instructions
- Use milk to prepare and chill each box of pudding in a separate bowl.
- Add a few drops of orange food coloring to vanilla pudding and stir. Gradually add additional drops as needed to achieve desired color.
- Divide half of chocolate pudding into glasses and carefully spread the pudding evenly into the bottom of each glass.
- Divide gummy worms over chocolate pudding.
- Sprinkle 1/3 of crushed Oreos over gummy worms.
- Divide half of orange-colored vanilla pudding over gummy worms and spread evenly. Set aside other half of orange pudding for snacking another time.
- Sprinkle 1/3 of crushed Oreos over orange pudding.
- Divide remaining chocolate pudding over crushed Oreos and spread evenly.
- Sprinkle remaining Oreos over chocolate pudding.
- Place 3 candy pumpkins on top of each glass and decorate with bone sprinkles, if using.
Notes
Home Chef Tip: If you don't have orange food coloring, you can add four drops of red food coloring + five drops of yellow food coloring to make orange. These drop guidelines are for traditional food coloring. If you use more concentrated gel food coloring, you will need less. Add a little bit of each color at a time and stir, then adjust as needed.
Recommended Products
Foxes Love Lemons, LLC is a participant in the Amazon Services LLC Associates Program, an affiliate advertising program designed to provide a means for sites to earn advertising fees by advertising and links to Amazon.com. There is no additional cost to you.
Nutrition Information:
Yield: 8 Serving Size: 1Amount Per Serving: Calories: 436Total Fat: 8gSaturated Fat: 2gTrans Fat: 0gUnsaturated Fat: 1gCholesterol: 3mgSodium: 392mgCarbohydrates: 89gFiber: 1gSugar: 65gProtein: 5g
This website provides estimated nutrition information as a courtesy only. You should calculate the nutritional information with the actual ingredients used in your recipe using your preferred nutrition calculator.


